How to Capture Screenshots on Raspberry Pi Tom's Hardware
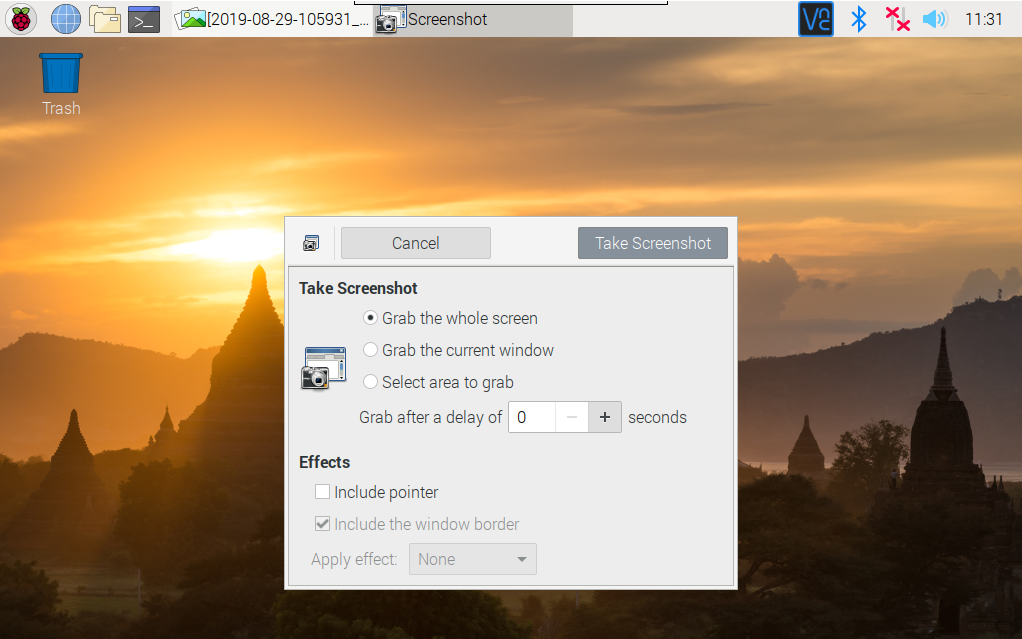
Take a Screenshot on the Raspberry Pi A very simple and efficient tool is Scrot, It is very minimalistic, but thanks to numerous parameters it offers enough scope to shoot optimal screenshots. My favorite feature is the auto-trigger, which saves the image after a countdown, but more on that later. The program is installed as follows:
How To Take Screenshots On The Raspberry Pi
It's easy to take screenshots on any Raspberry Pi model, at least if you use Raspbian, the official Pi operating system. The following instructions are done on Raspberry Pi 4 running the latest version of the operating system, Raspbian Buster, but they will certainly work on any other model and any recent version of the operating system. ..
How to take Screenshots on the Raspberry Pi Pi My Life Up
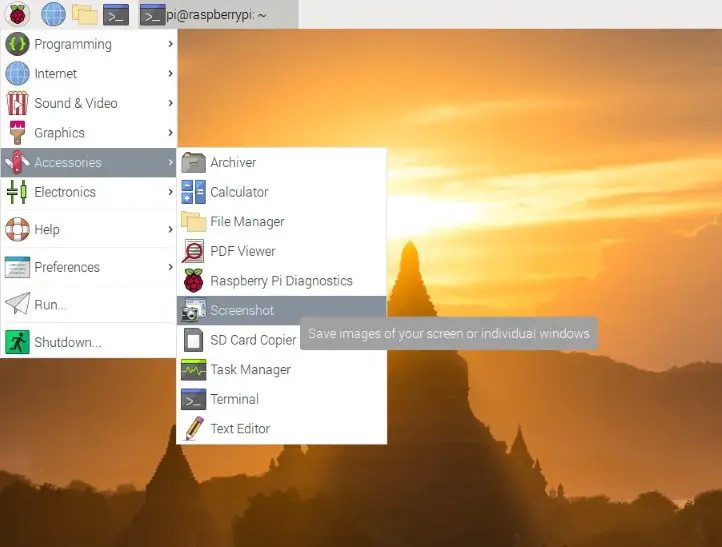
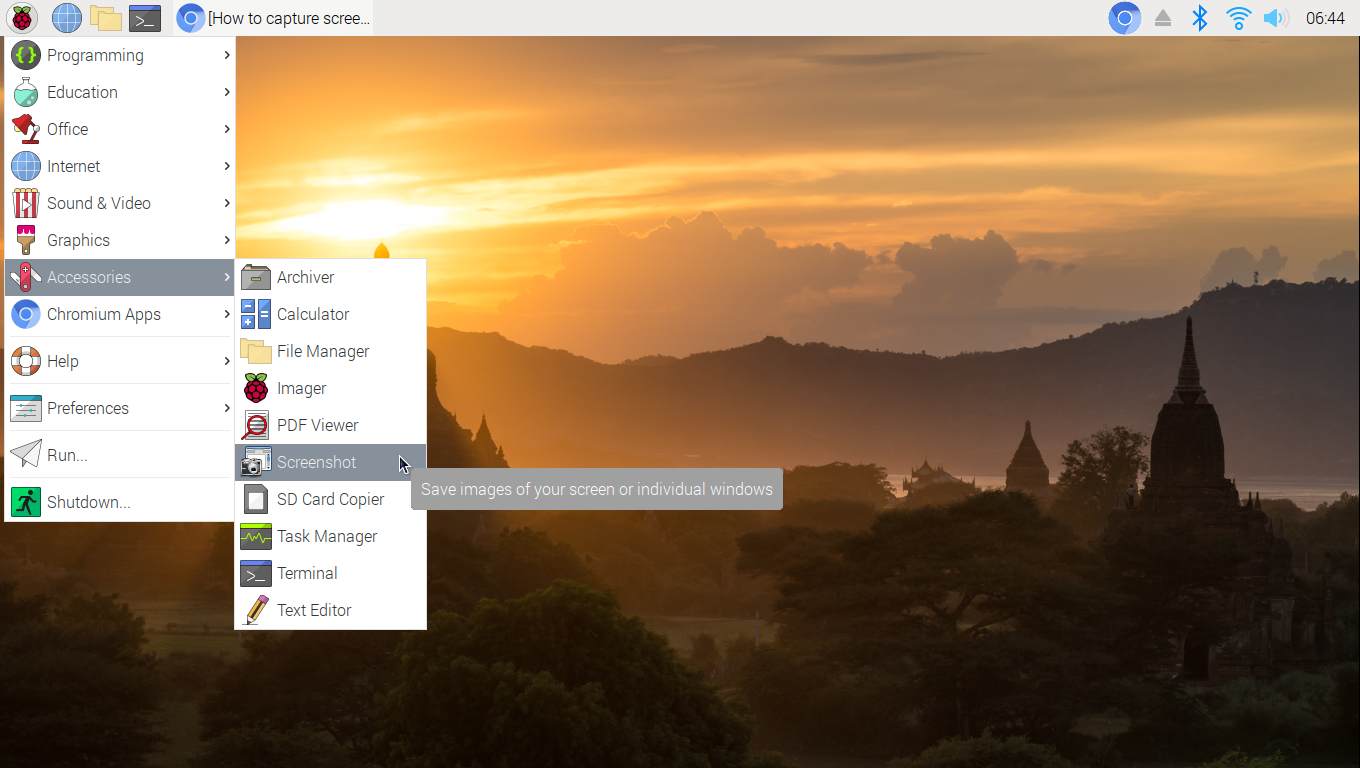
How do you take a screenshot on the Raspberry Pi OS? Taking screenshots on Raspberry Pi OS Tip: We will use Raspberry Pi OS - BullsEye for this post. However, the methods discussed here should also work for any other Raspberry Pi OS you are running. Method 1: Take Screenshots Using the PrtSc (PrintScreen) Key
How to Take Raspberry Pi Screenshots Raspberry Pi Spy
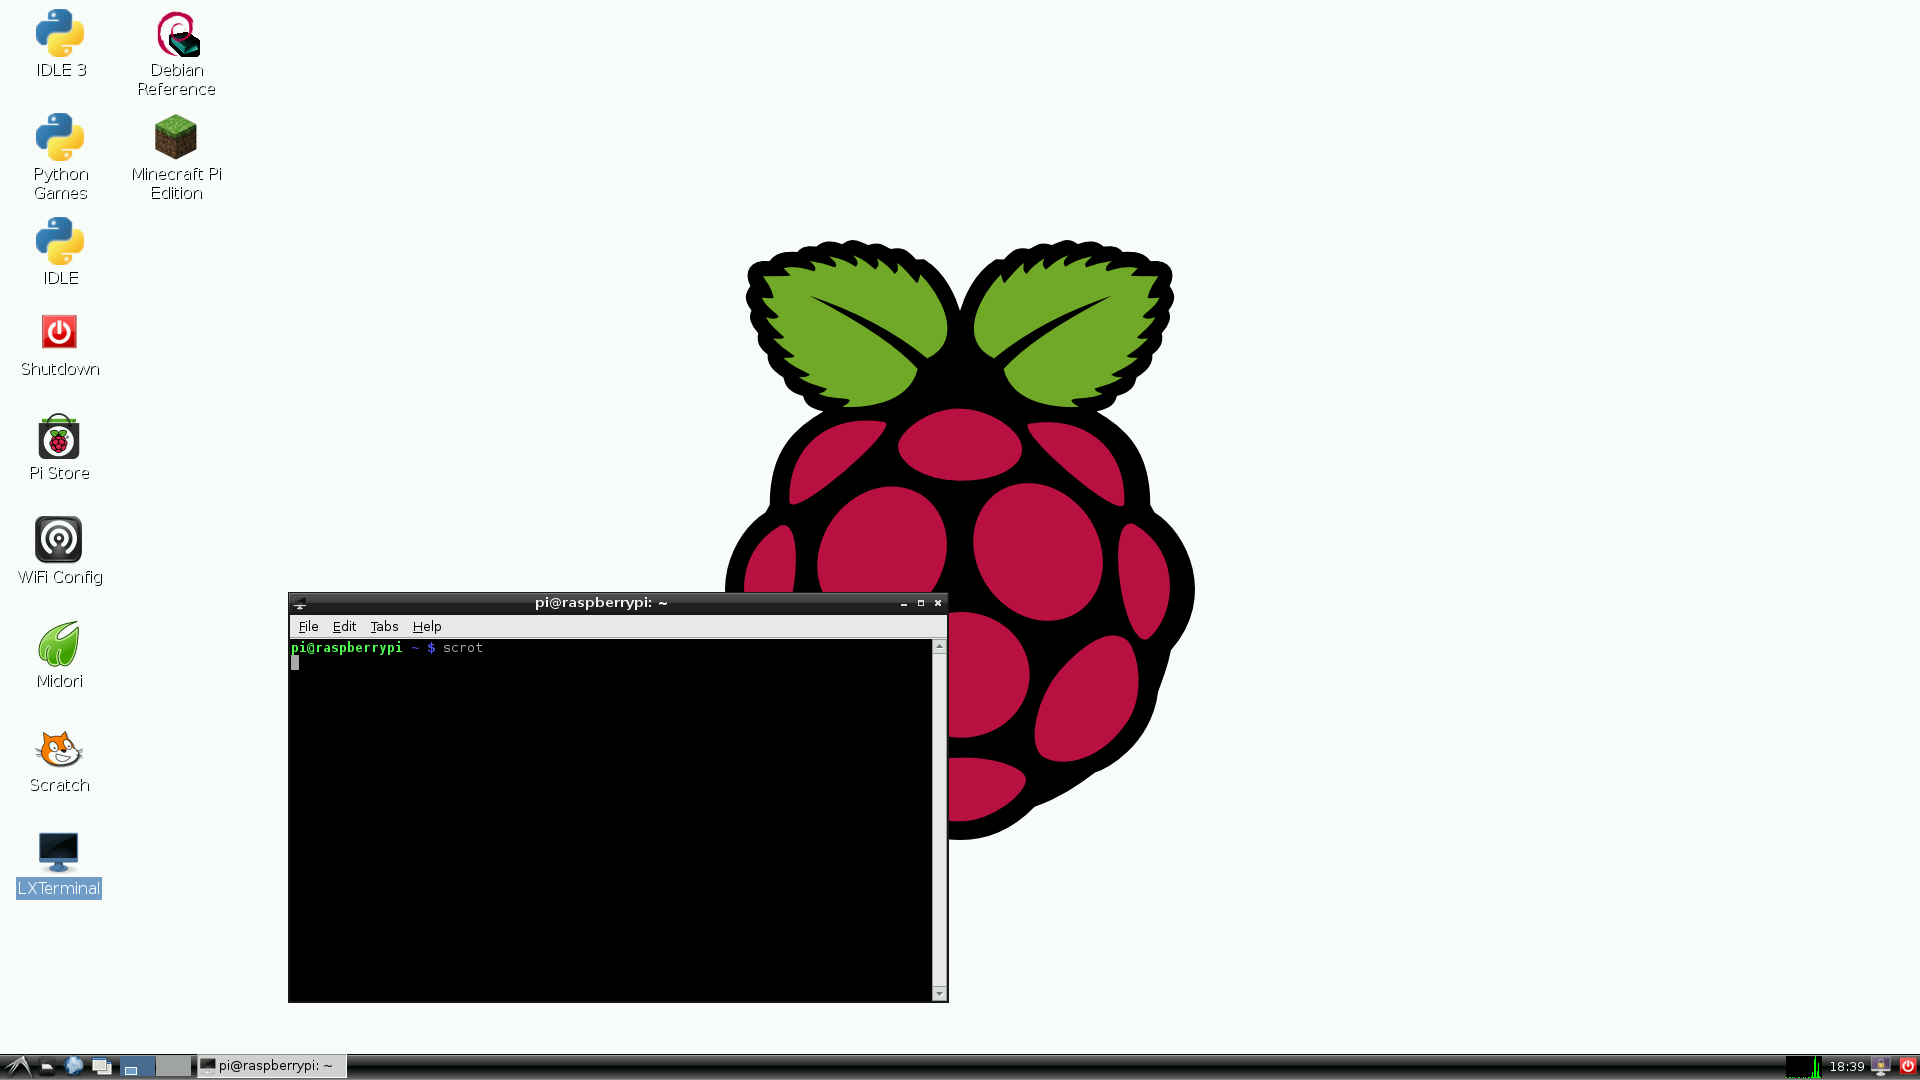
To install scrot on the Raspberry Pi use: sudo apt-get install scrot To check that scrot is installed and working as expected, run: scrot -v This will print out the scrot version number and exit. To take a screenshot, you need to have the desktop running on your Pi. Open a terminal window and just execute scrot: scrot

How to Take a Screenshot on Raspberry Pi Using scrot — Maker Portal
The Easy Way: Just Press 'Printscreen' The Pixel desktop environment on Raspberry Pi OS includes a screenshot tool called scrot. It's configured to run whenever you press the 'printscreen' key. This key is usually located at the top of the keyboard, next to the function keys, and is often shortened to something like PrtSc or PrtScn.
How to Take Screenshots on a Raspberry Pi (Ultimate Guide)
1. Using a Keyboard Hotkey If you have the Scrot installed on your Pi successfully, then your default hotkey for taking screenshots will be the Print Screen key. You can try this easily by pressing the Print Screen button and then checking the /home/pi directory.

The Ultimate Guide to Taking Screenshots on a Raspberry Pi
In this video you will learn:How to take a screenshot on the Raspberry PiHow to add custom keyboard shortcuts to Raspbian.Script URL: https://robertalberto.c.
How to capture screenshots in Raspberry PI 4
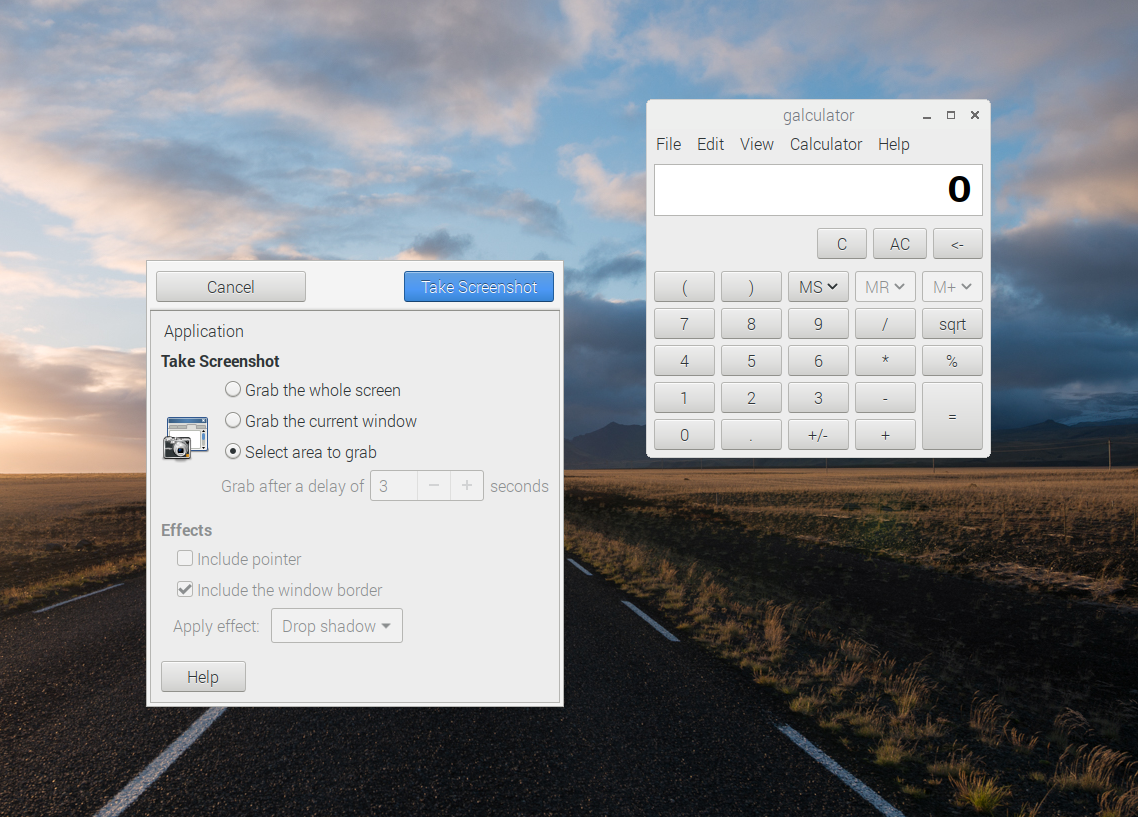
Using Gnome Screenshot Scrot is nice for a commandline tool, but it's easier to use a screenshot tool with a graphical interface. The main graphical screenshot tool for the Pi is Gnome.
The Best Ways to Take Screenshots on Raspberry Pi
Pressing your keyboard's PrintScreen button will take a full-screen screenshot, but that's just the beginning! We'll look at other handy ways to take screens.

Raspberry Pi 3 Raspbian Taking screenshots techtutorialsx
Learn how to capture and view screenshots on your Raspberry Pi for project documentation. Use Scrot and ShotWell to do this solely through the command line. Scrot is a command line screen capturing application that's easy to download and use, and Shotwell is a light-weight photo viewing application. Step 1: Setup
Take screenshots on a Raspberry Pi — The MagPi magazine
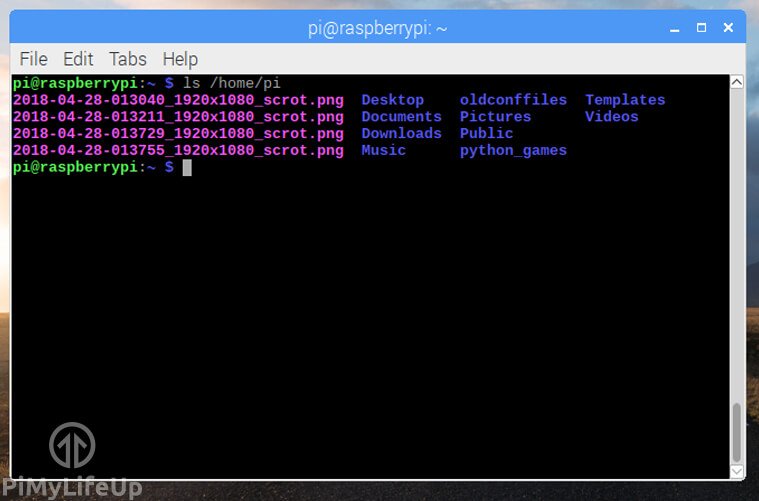
This will save a screenshot of the entire Raspberry Pi window under the /home/pi directory under the format 'year-month-day-time_size_scrot.png' pi@raspberrypi:~$ scrot View fullsize. Screenshot of the entire screen. Under the folder '/home/pi' you should see a screenshot with the current year as the first part of the '.png' file.
Taking a screenshot in Raspberry pi 4 The Engineering Projects
Raspberry Pi MicroSD Card Power Supply Ethernet Cable Taking Screenshots Using Scrot In this case, we'll employ Scrot, a software program, to help with the PrintScreen procedure. This fantastic software program allows you to take screenshots using commands, shortcut keys, and enabled shortcuts. Features of Scrot

The Ultimate Guide to Taking Screenshots on a Raspberry Pi
1. Taking Screenshots Using Scrot Scrot is a command-line screenshot utility that offers a host of screen-capturing capabilities, ranging from delaying screenshot capturing and specifying directory and file name to limiting the scope of capturing, creating thumbnails, and invoking third-party utilities to manipulate the screenshot.

Taking screenshots on Raspberry Pi OS YouTube
To take a screenshot with Scrot, simply open the command line and send the following command: 1. scrot. It should take a screenshot of the whole screen. By default, it will save the image with a name containing the timestamp when the screenshot was taken, and it will be stored in the current directory. [3]

4 Steps to take a screenshot on Raspberry Pi [ How to ]
1. If you're on an older version of Raspbian and unsure if Scrot is installed or not, then you can run the following command to check. scrot Copy 2. If Raspbian responds with "command not found" then you will need to install Scrot. To do this, run the following command. sudo apt-get install scrot Copy 3.

How to Take a Screenshot on the Raspberry Pi Using Scrot Make Tech Easier
To take a screenshot of the full VNC window, to capture the entire Raspberry Pi desktop, press Command-Shift-4, to change the mouse cursor to crosshairs. Click and hold the mouse and drag across the area that you wish to capture as a screenshot. Releasing the mouse will record the screenshot.